
Student access - a nice upgrade
Wednesday 11 November 2015
 Those who are eagle eyed may have noticed a subtle change to the Inthinking Biology site homepage recently. It is now possible to edit your profile using 'Account details' or bookmark pages as 'Favourite pages'.
The biggest change however is to the management of the student access to the site. Only a minority of teachers use this feature at the moment so to offer some encouragement this post aims to show a few of the benefits and introduce the new features.
What features does student access offer?
- The ability to hide specific pages from students - for example; model answers, or topics that haven't been covered yet
- Specific pages can be shared with students and teacher can see when students accessed the page.
- Teachers can create up to 5 student groups each with it's own invitation URL to share with the students.
- Students create their own access credentials (email and password) to access the student interface.
- There is a unified login for students and teachers at www.student.thinkib.net
- Teachers can write notes on each student profile (hidden from students) and edit student profiles.
- Teachers can easily manage the groups and move students if necessary.
- There is a simplified navigation for students
How do I set up groups for my students?
Step 1 - click "Set up"
You will see the following page with a list of your groups.

Step 2 - click "+Create group" -
Give the group a name, and a discription. You also should choose a year group.

Step 3 - Choose the content you want available to students.
There are two possible approaches, either
- Select just the pages relevent for this lesson or this topic. This gives students really simple navigation. µ
You will use the 'check none' box first then select just those pages you want to show students. - Remove the pages which you don't want students to see, but give them access to all the rest.
This is a bit more complex for students to navigate, but it has the advantage that they can read ahead, or catch up without you having to do anything.
You can also hide the blog posts from students if you wish.

Step 4 - "Save group!"
It really is quick to set up. Your groups will be visible in the set up student access page.

Step 5 - share the URL with your students
Just click the "+ Add students" box and a popup will show the URL for students to register with this group.

That is really all there is to it.
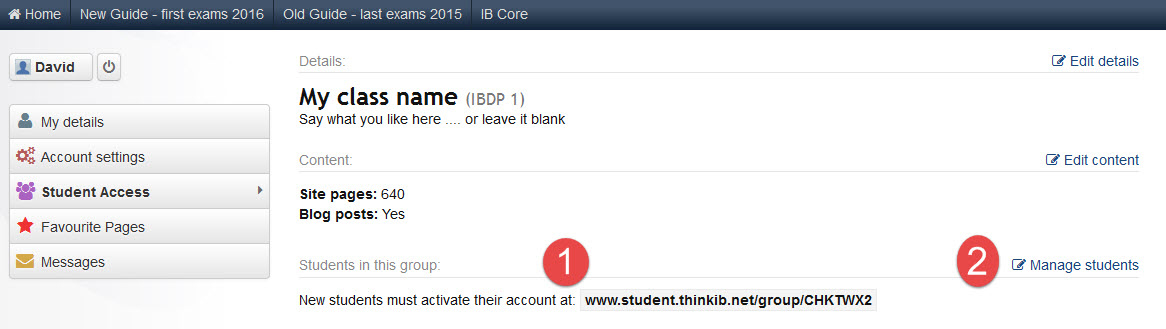
To change the settings of a group or manage the students simply click the group name.
On this page you can click a link to:
- edit the group details,
- change the content visible to students
- manage the students
How does it look to students?
When students navigate to the group invitation URL they first see this page.

If they have a thinkib account already from another subject they can use this account, and it will add Biology to their list of groups.
If not they need to fill in a few boxes to create a new account.

A single URL to access any pages: student.thinkib.net/biology
Once they have joined the group there is only one URL to remember. This will get students to their student dashboard with links to all their groups.

I hope this post helps a few more to use the student access. Thanks to Lindsay for the question that nudged me to write it.