Activity: Lenses

This activity will throw you right into Optics by introducing convex and concave lenses. You'll have the chance to use Algodoo to simulate refraction and, more broadly, construct ray diagrams for thin lenses. The lens formula is also provided.
In Algodoo if you make an object transparent and shine a laser on it the light will reflect and refract according to physical laws.
- What is the law that relates the angle of refraction and incidence?
Point objects
A point object reflects light in all directions but we are only interested in the rays that pass through the lens so don't have to draw a million rays.
- Make a point source by putting lasers on top of each other at different angles. In the image below the angle between the rays in 1°, you may like to use less. To keep them together you can group them. This function is in "appearance".

Distant object
As you move away from a point object the angle between rays that pass through a lens becomes smaller and smaller. If the object is a long way away we can assume the rays are parallel. If an infinite distance away then they are parallel.
- Make a set of parallel rays to represent an object at infinity.
Making lenses
Here's an animation of how to make the shape, all you have to do then is change it to glass.
You can work out how to make a convex lens yourself.
- Observe the way that the image position changes as you vary the position of the object for each lens.
- Try making lenses using different sized circles and observe the way they refract the light rays.
- Which lens bends the light most, the one made from big circles or the one made from small circles?
As you know, light is a wave, so we can also use a wave model to represent the refraction through lenses. Here you are going to use Paul Falstad's ripple tank applet.
- Stop the simulation and clear the waves.
- Remove the single source by selecting it and selecting cut from the edit menu.
- I should've told you , don't try to delete, there seems to be a bug.
- Make a plane wave by adding line source from the "add" menu.
- Add a lens by selecting "add ellipse medium" from the add menu (The add lens option only seems to give half a lens)

- Try changing the shape of the lens and observe the effect on the refracted waves.
Parallel rays of light cross over at the principal focus, the distance between the lens and this point is the focal length (f).
- Which of these two lenses would have the longest focal length?
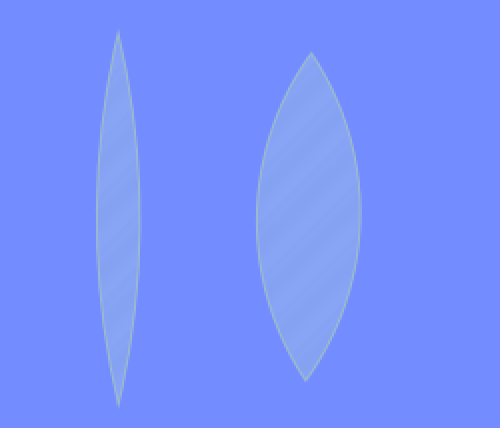
The concave lens doesn't really have a focal point since the rays diverge, however the rays would meet if we traced them back on the side of the object. We call this a virtual point.

Ray diagrams are drawn to enable us to locate the image of an object, for this we use an extended object that has two points, one on the axis and one above. We draw rays to find the image of the top point and simply draw the bottom point the same distance away but on the axis.
You only need two rays to find the image
- a ray passing through the centre is undeviated
- a parallel ray passes through the principal focus
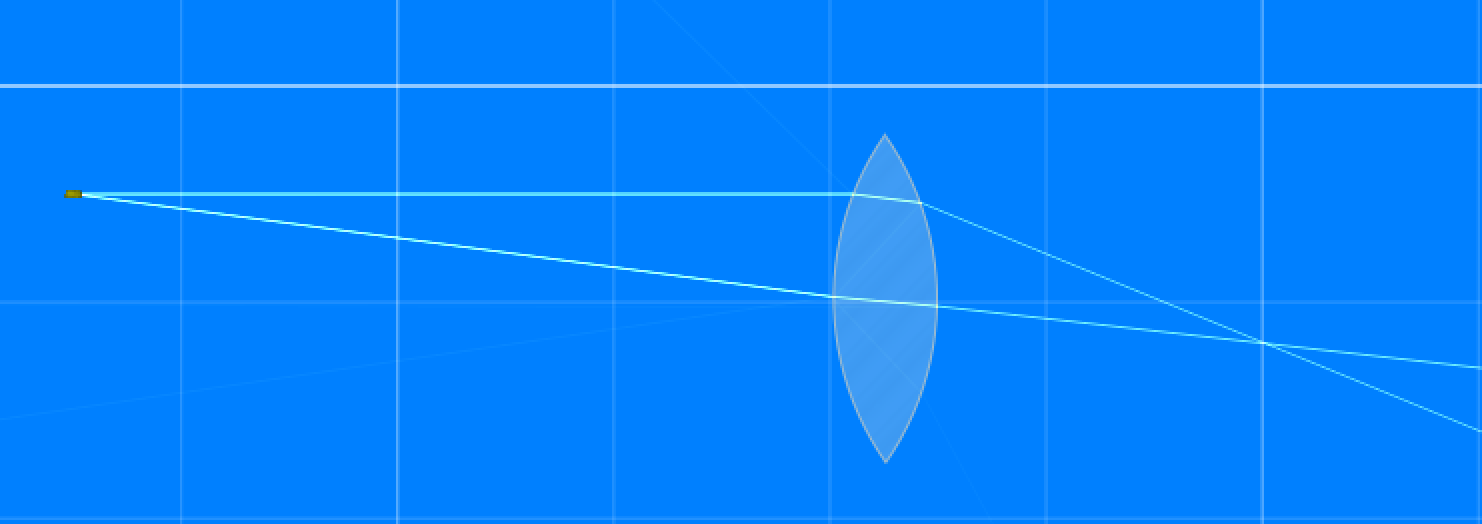
- With paper pencil and a ruler draw a ray diagram for an object 15 cm from a convex lens of focal length 10 cm.
The same technique can be used for a concave lens but the parallel ray diverges from the principal focus.
- Draw a ray diagram for an object 15 cm from a concave lens of focal length 10 cm.
Note that the rays don't cross but appear to come from a point on the image side of the lens, this is a virtual image.
- Draw a ray diagram for an object 5 cm from a convex lens of focal length 15 cm.
- Is this image real or virtual?
Using an optical bench project an image of an illuminated object onto a screen with a convex lens.
- Check that the lens equation holds true.